Upgrading an exterior door is one of the most impactful decisions you can make for your home’s security, visual appeal, and thermal efficiency. Yet, beneath the clean lines of a freshly hung entryway lies an intricate assembly of structural engineering, building science, and strict manufacturer protocols.
For homeowners and business owners, deciding between a quick DIY project and a professional installation usually comes down to risk. A single mistake during installation can compromise your home’s envelope, leading to structural rot, costly draft leaks, or a completely voided product warranty. Understanding the best practices of professional exterior door installation helps you make an informed decision for your property.
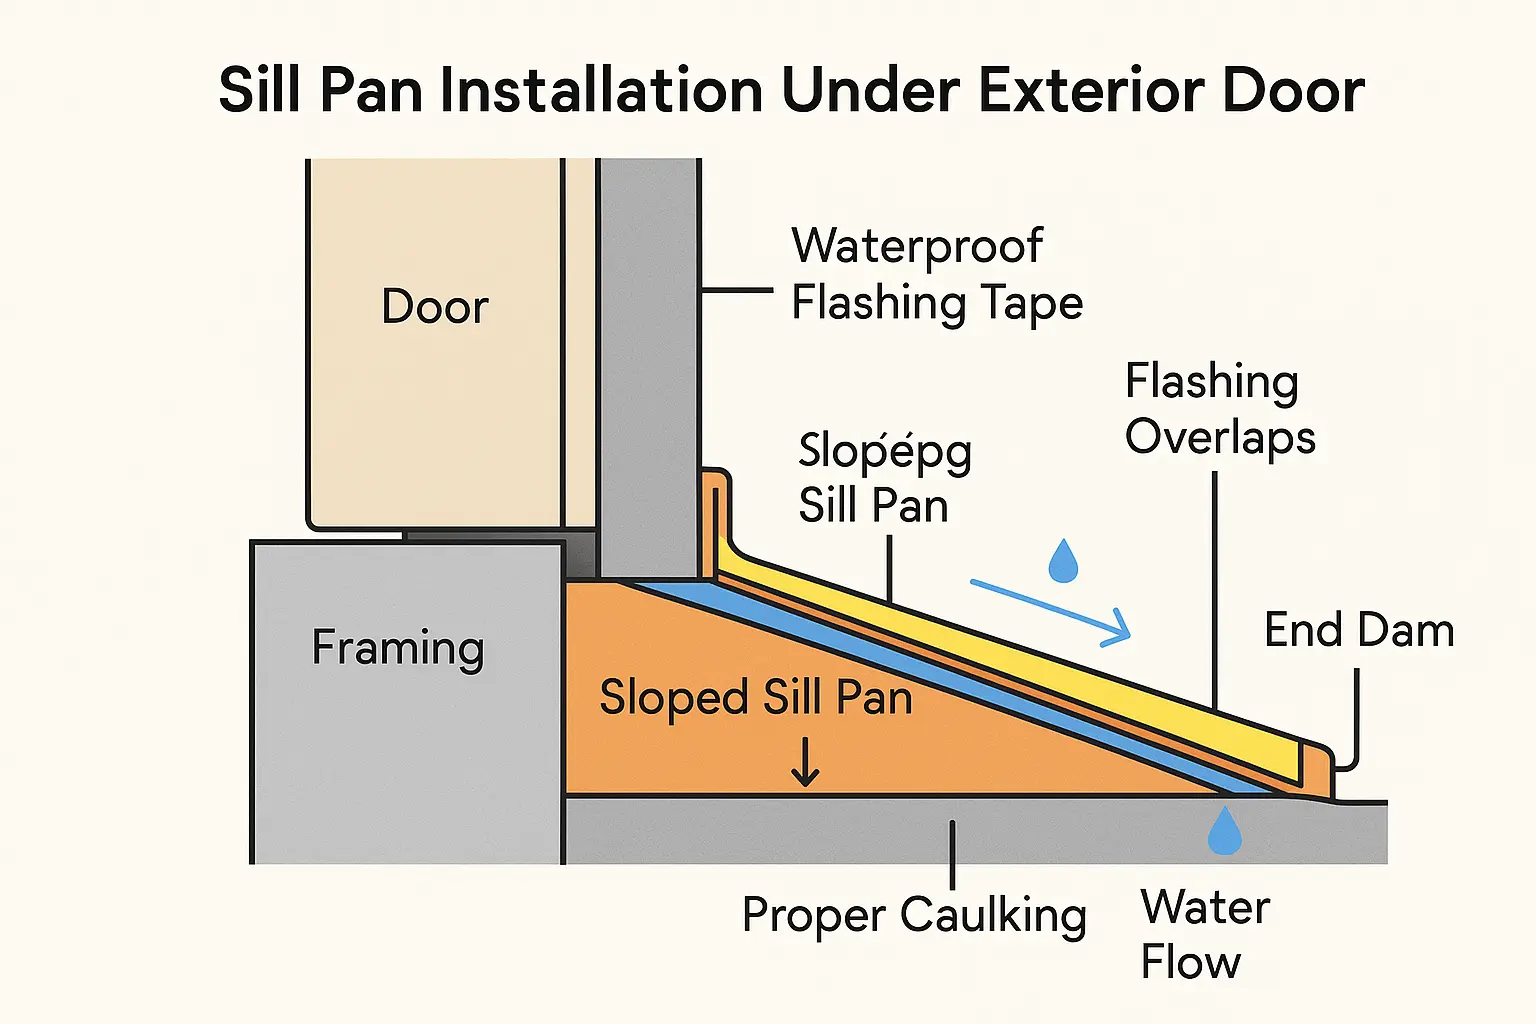 This diagram clarifies how professional sill pan installation with proper flashing tape layering creates a watertight seal that channels water away, preventing rot and leaks beneath exterior doors.
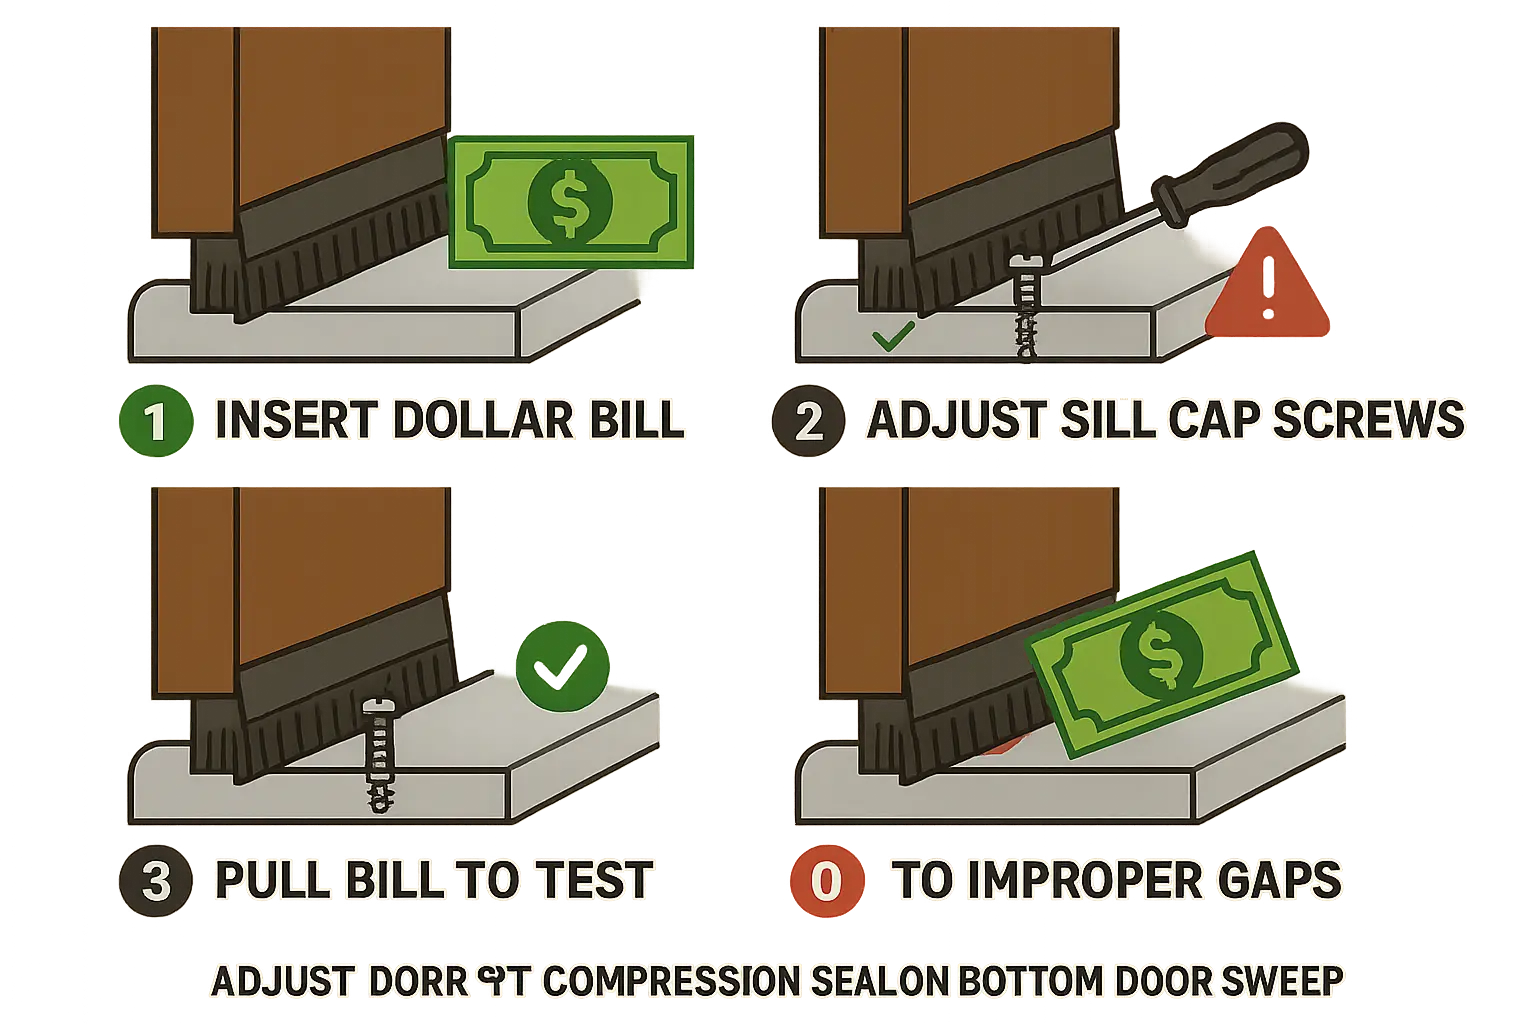 Follow these steps to achieve a perfect weatherproof seal at your door threshold using the dollar bill test, preventing drafts and water intrusion effectively.
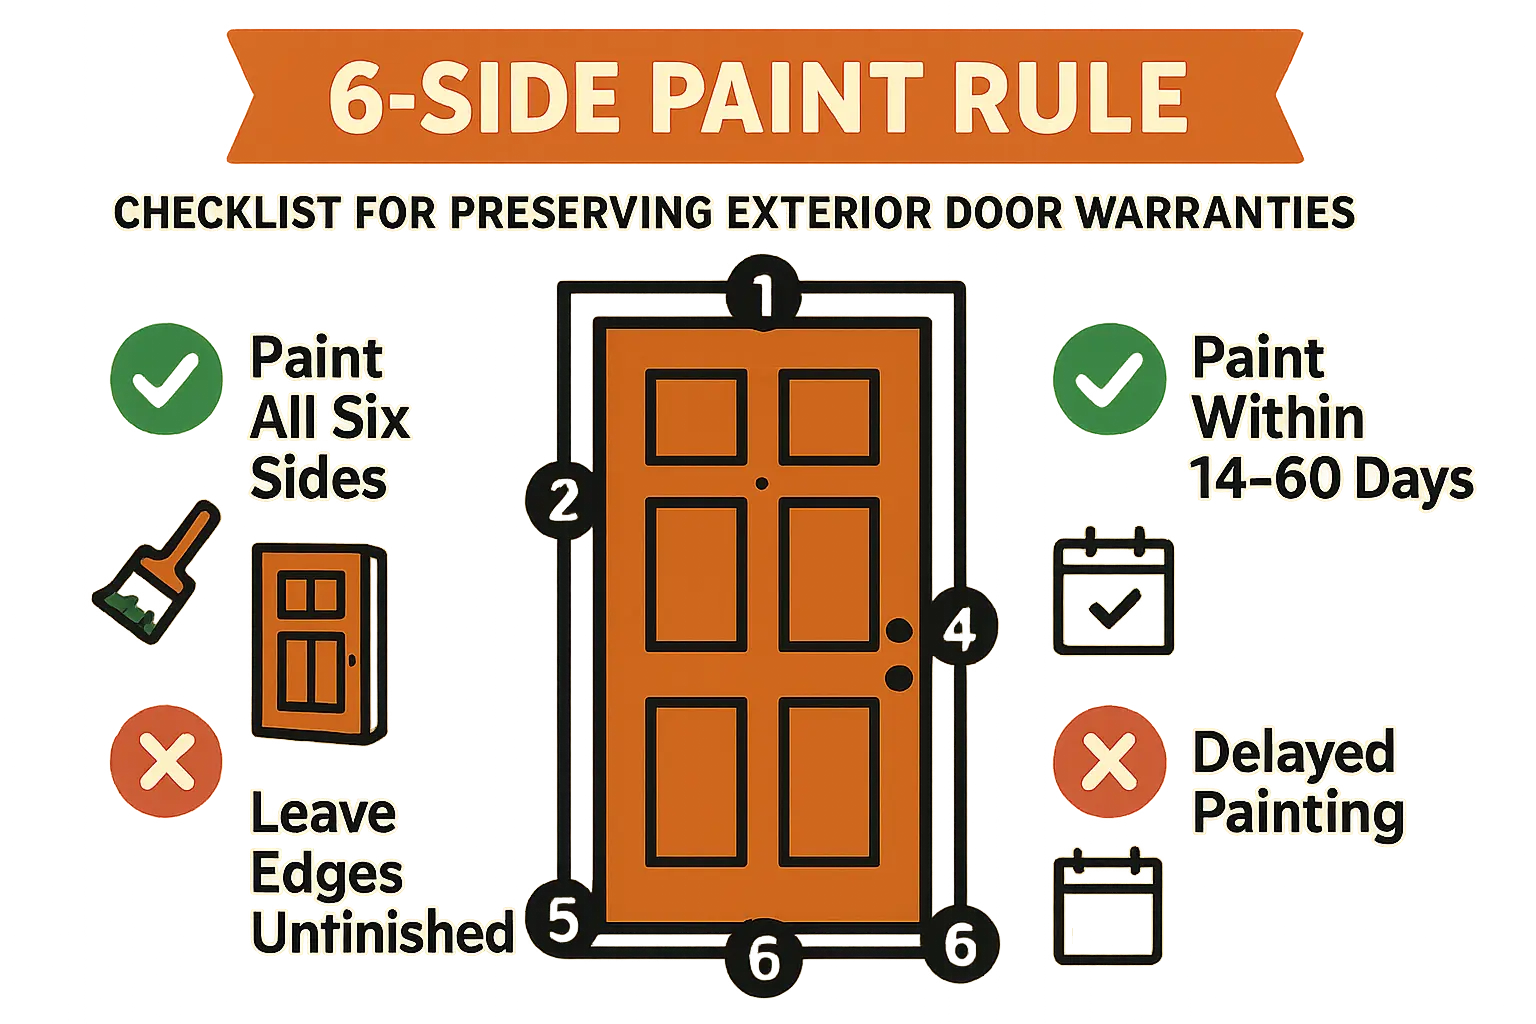 Remember to paint all six sides of your exterior door promptly to protect your investment and avoid warranty voids—this simple step prevents costly warping and damage.