Structural Wall Reinforcement for Heavy Automatic Door Installation


Published: Sep 1, 2026

You’ve picked out the perfect door. It’s solid, secure, maybe even automated—a statement piece that promises to upgrade your space. But as you admire its weight and craftsmanship, a critical question often gets overlooked: Is your wall ready for it?

The success of a heavy-duty or high-traffic automatic door doesn’t hinge on the door itself. It rests, quite literally, on the unseen framework inside your wall. A standard frame designed for a lightweight interior door is like a bookshelf built for paperbacks; asking it to support a heavy oak or steel door is like loading it with encyclopedias. Sooner or later, it’s going to buckle.

This guide is your blueprint for understanding the structural demands of a heavy door. We’ll move beyond basic installation steps and dive into the essential physics and reinforcement techniques that ensure your beautiful new door operates flawlessly for years to come, without sagging, binding, or damaging your home’s structure.

The Unseen Physics of a Heavy Door


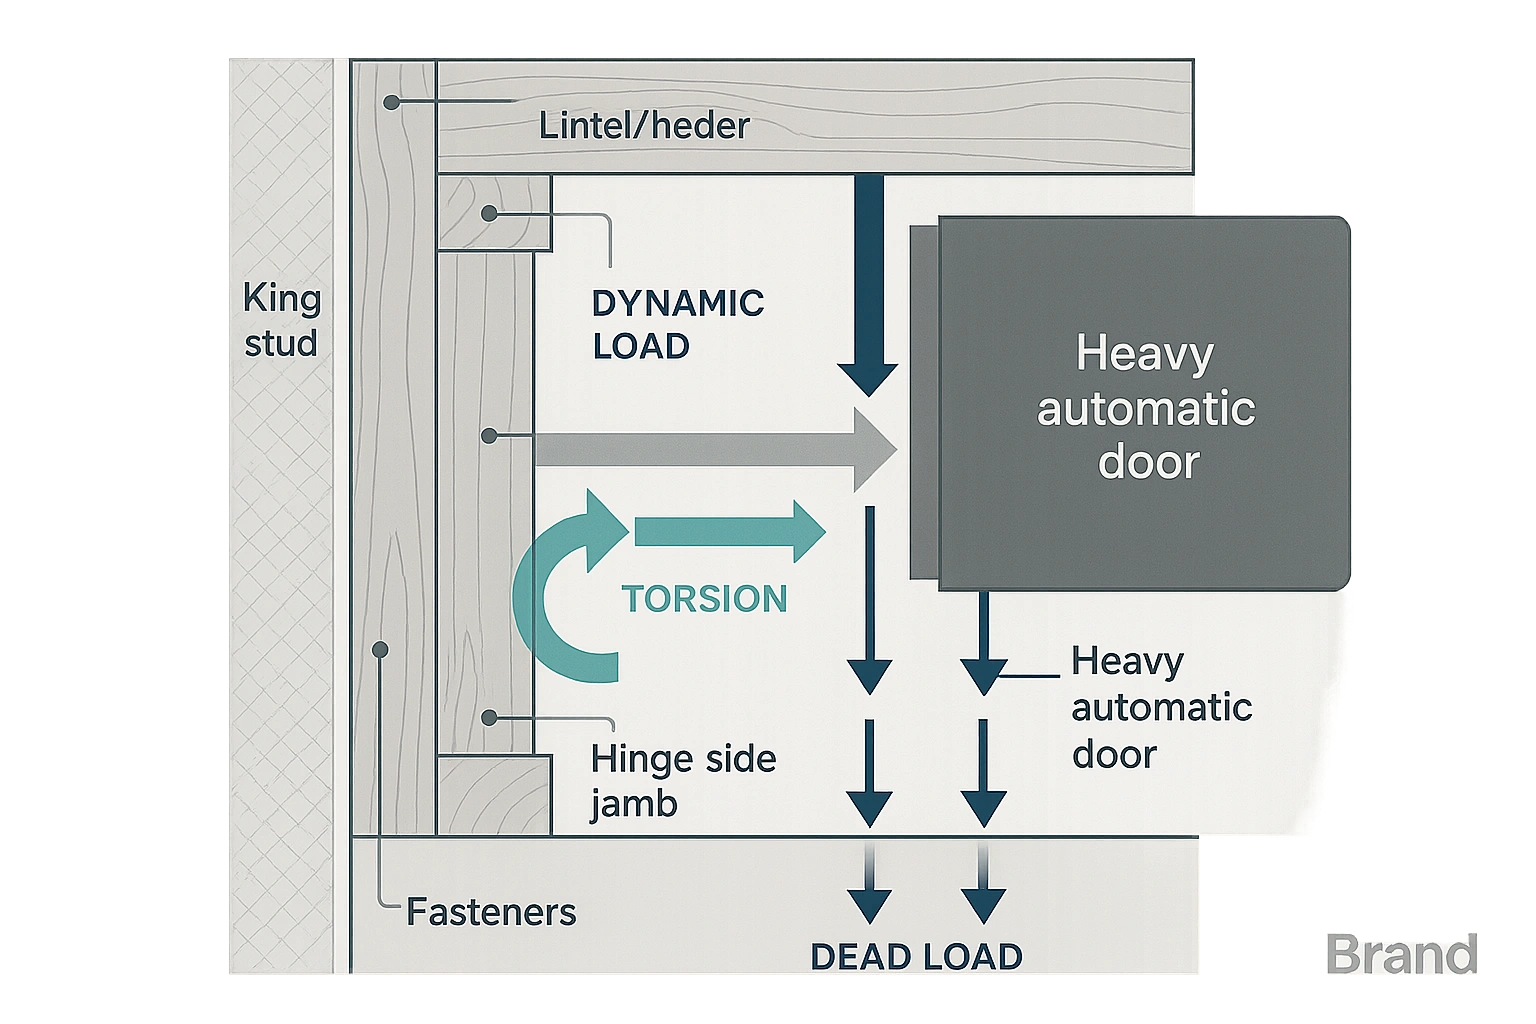
Understanding the structural load paths in heavy-duty doors builds confidence in reinforcement strategies and confirms our engineering expertise.

Before a single screw is turned, it’s crucial to understand the forces your wall will be up against. Unlike a simple picture frame, a door is a dynamic object that exerts constant and changing stress on its surroundings.

Core Concepts, Simply Explained

  • Dead Load: This is the constant, downward pull of the door’s weight. For a 200lb door, that’s 200 pounds of force pulling on the top hinge and the entire hinge-side of the frame, 24/7.
  • Dynamic Load: Every time the door opens and closes, it generates momentum. This creates a swinging, pulling force that is significantly greater than the door’s static weight, putting immense stress on the hinges and frame.
  • Torsion: As the door swings, it also applies a twisting force to the frame. If the frame isn’t rigid enough, this torsion can cause it to warp over time, leading to that all-too-familiar sticking or binding.

Anatomy of a Wall Opening: Your Door’s Support System

To manage these forces, a door frame relies on the structure hidden within the wall. Here are the key players:

  • King Studs: These are the vertical studs that run from the floor plate to the top plate of the wall, forming the sides of the full opening.
  • Jack Studs (or Trimmer Studs): These shorter studs fit inside the king studs and support the header. The door frame is fastened directly to them.
  • Lintel (or Header): This is the horizontal beam that spans the top of the door opening. Its job is to carry the weight of the wall (and potentially the roof and floors) above the door and transfer it to the jack and king studs.

For a standard, lightweight door, this system is more than adequate. But for a heavy-duty door, every component, especially the lintel and the hinge-side jack stud, must be up to the task.

How to Assess Your Existing Structure

The first step is a preliminary check to understand what you’re working with. Determining if a wall is load-bearing is the most critical part of this assessment. A load-bearing wall supports the structure above it (like a second story or the roof), and any modifications require careful planning.

Signs you might be dealing with a load-bearing wall:

  • It is perpendicular to the floor joists above.
  • It’s a central wall in the house that other walls connect into.
  • There’s a beam or another wall directly above it on the next floor.

If you have any doubt, this is the point to stop and consult a professional. Proper door frame testing and assessment by an expert can prevent catastrophic structural failure.

The Professional Installation Method for Heavy-Duty Doors


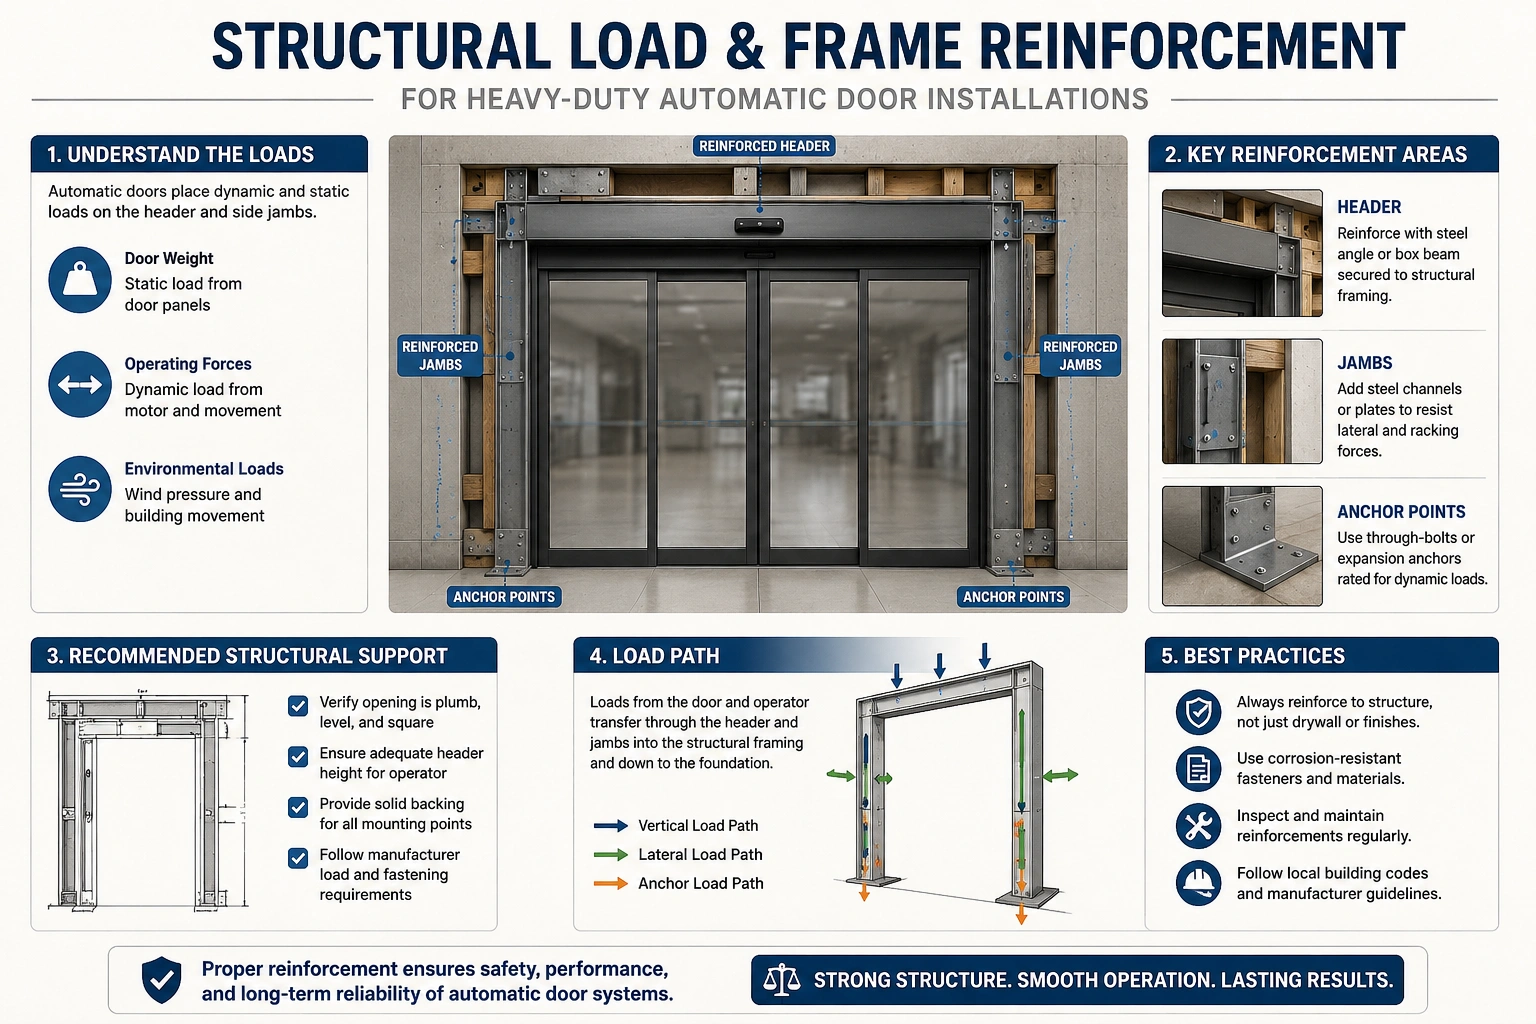
Comparison of standard and heavy-duty door frame reinforcement methods highlights critical structural distinctions for reliable installation.

Installing a heavy door isn’t just a matter of using more muscle; it requires a more robust technique. The goal is to ensure the door’s immense load is transferred deep into the wall’s framing, not just hung on the thin wood of the door jamb.

Reinforcing the Hinge-Side: The Secret to a Sag-Free Door

The hinge-side jamb bears almost the entire dead load of the door. A standard installation, where short screws only go into the jamb and the jack stud, is destined to fail.

  • Common Mistake: Using the 3/4-inch screws that come with most hinge sets. These barely bite into the wood of the jamb itself.
  • Professional Solution: For the top hinge, which takes the most strain, replace the standard screws with at least two 3-inch structural screws. These screws should pass through the jamb, through any shims, and anchor firmly into the jack and king studs behind it. This directly transfers the door’s weight to the building’s frame. Do the same for at least one hole in each of the lower hinges.

Shimming for Load Distribution, Not Just Alignment

Shims are small wooden wedges used to make a door frame perfectly plumb (vertically straight) and square within the rough opening. In a heavy door installation, their role is even more important.

  • The Goal: Create a solid, continuous connection between the door jamb and the wall framing. Place shims in pairs (one from each side) directly behind each hinge location and at the top, middle, and bottom of the latch side.
  • Progress Checkpoint: Before securing the frame, ensure there are no gaps between the jamb, the shims, and the stud. A solid connection ensures the load is distributed evenly along the entire height of the frame, preventing pressure points that can lead to cracks and warping.

Advanced Reinforcement & Material Considerations


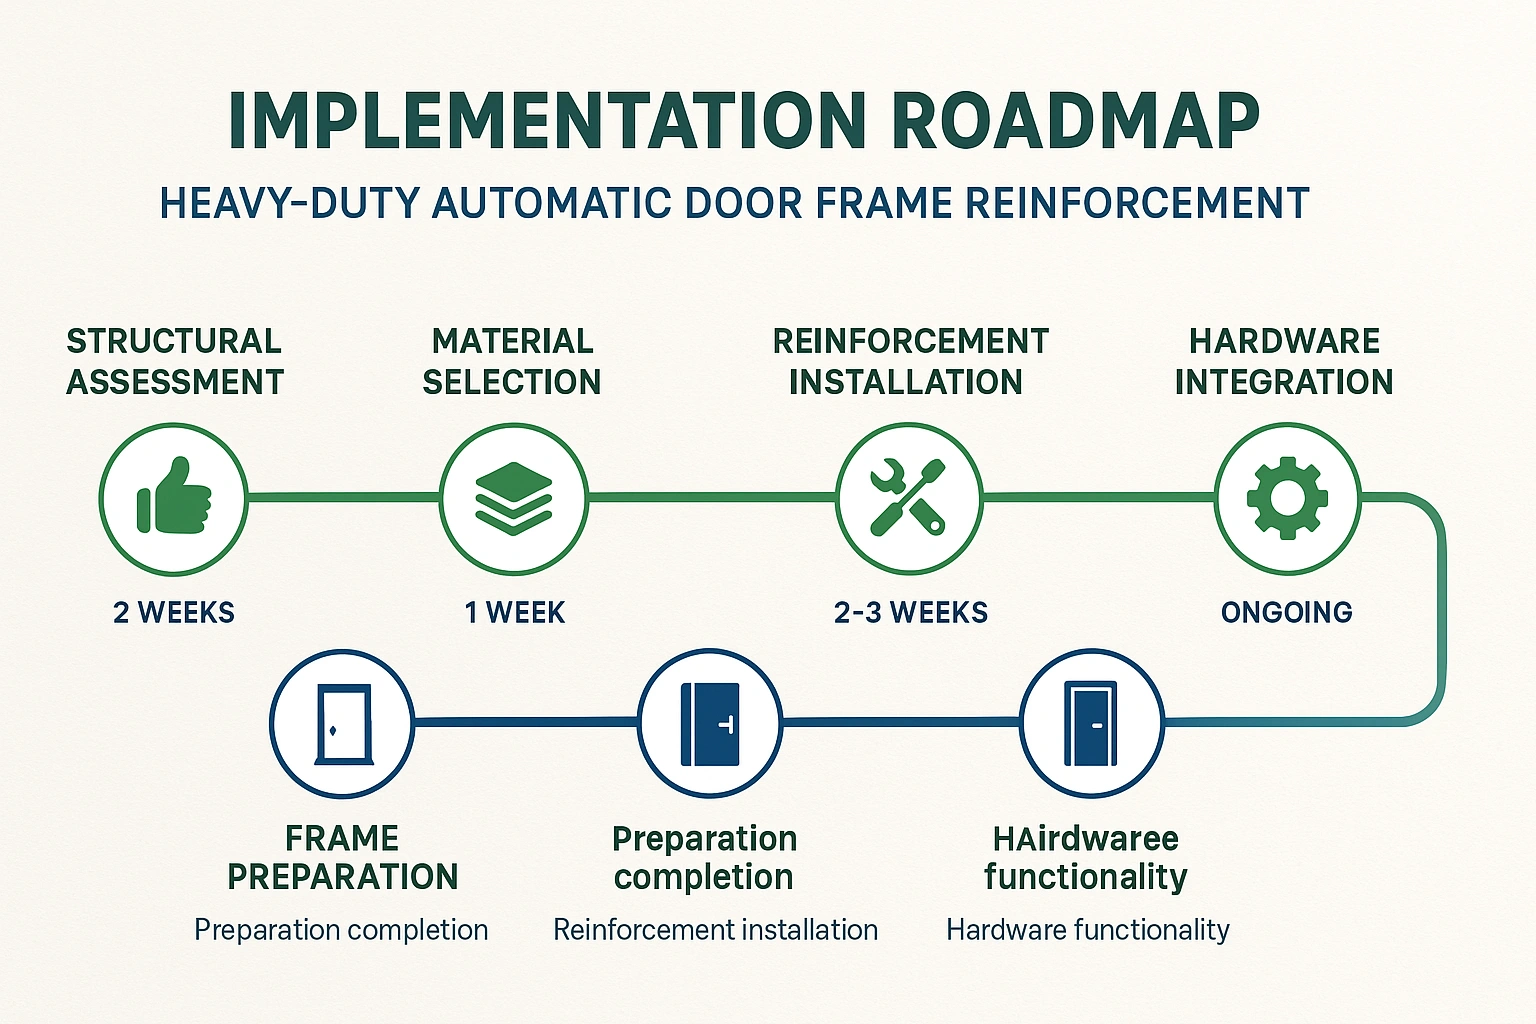
A clear reinforcement project roadmap streamlines decision-making and reduces installation anxiety for professionals handling heavy-duty doors.

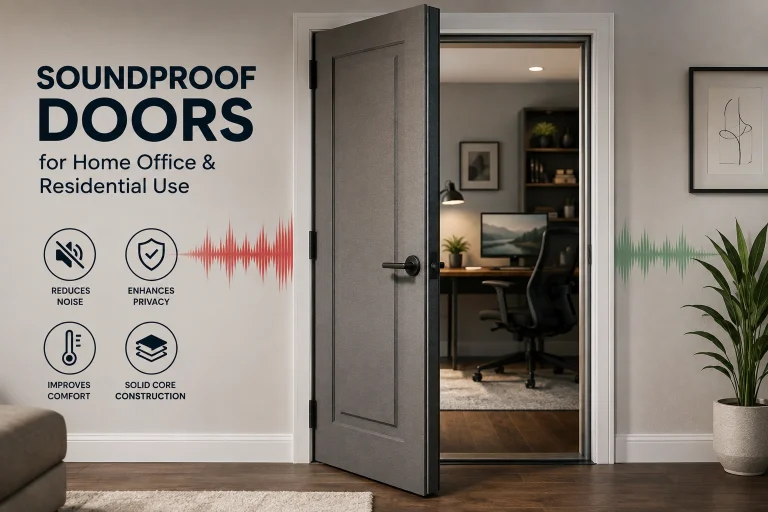
For extremely heavy doors—like a large solid wood entry door, an soundproof door, or an automated commercial entry—standard wood framing may not be enough. This is where advanced materials and techniques come into play.

Reinforcement for Different Wall Types

  • Wood Stud Walls: The techniques above (structural screws, solid shimming) are often sufficient. For extreme loads, you might consider doubling the jack studs to provide more structural support and a wider surface for fastening.
  • Steel Stud Walls: These require special fasteners and potentially reinforcement plates or wood blocking installed inside the steel stud cavity to provide a solid anchor point for the heavy-duty screws.
  • Concrete or Block Walls: Installation in masonry requires a different approach. A steel sub-frame is often anchored directly into the concrete with expansion bolts (like sleeve or wedge anchors) to create a secure and perfectly square opening for the door frame.

When to Choose Steel Door Frames vs. Reinforced Wood

While a solid wood jamb can be reinforced, sometimes it’s better to start with a stronger material.

  • Reinforced Wood: Look for options that use solid wood or engineered lumber, which is far stronger than the standard finger-jointed pine. Choosing a jamb that won’t rot is also crucial for exterior doors exposed to moisture.
  • Hollow Metal/Steel Frames: For high-traffic commercial settings or extreme-weight doors, a steel frame is the professional standard. They are welded for maximum rigidity, are impervious to warping, and are designed to handle the forces of automatic door openers with ease.

Long-Term Integrity & Troubleshooting


A successful installation is just the beginning. Proper door maintenance is key to ensuring your heavy door continues to function smoothly.

Annual Maintenance Checklist:

  1. Check Hinges: Tighten any loose hinge screws. If a screw hole has become stripped, use a larger screw or a wood-filling epoxy to repair it.
  2. Inspect the Reveal: The gap between the door and the frame (the “reveal”) should be even all the way around. A widening gap at the top latch-side corner is the first sign of sagging.
  3. Test the Operation: The door should swing freely without sticking or rubbing against the frame. If it binds, it’s a sign that the frame has shifted or the door has sagged.
  4. Lubricate Hardware: Apply a silicone-based lubricant to hinges and the latch mechanism to ensure smooth operation, especially for automated doors.

Diagnosing these issues early can prevent the need for a major door replacement service. The dynamic load of a heavy automatic door is a constant structural challenge, unlike the intermittent manual forces involved when you learn, for example, how to fix a manual garage door. This makes proactive maintenance even more critical.

Frequently Asked Questions (FAQ)


What is a header, and why is it so important?

A header (or lintel) is the structural beam above your door that carries the weight of the structure above. An undersized header can sag under the load, causing the entire door frame to deform, which leads to the door sticking and becoming difficult to operate.

Can I just use more long screws to reinforce my existing frame?

Using 3-inch structural screws on the hinges is a critical step, but it’s only part of the solution. If the underlying structure (the jack studs and header) is weak, or if the frame itself is made of low-quality material, simply using longer screws won’t prevent long-term problems like warping or sagging.

How do I know for sure if I need to call a professional or structural engineer?

You should always consult a professional if:

  • You are unsure if a wall is load-bearing.
  • You see cracks in the drywall above the door corners.
  • The header appears to be sagging or is undersized for the opening.
  • You are working with a masonry or steel stud wall and are unfamiliar with the proper anchoring techniques.

When it comes to the structural integrity of your property, an expert consultation from a team specializing in everything from installations to commercial door repair is a small investment that prevents major problems down the line.